I found this recipe on Pinterest (duh) but it's actually a Pillsbury recipe! If you like pizza, you'll like this one. If you don't like pizza, kindly excuse yourself and reevaluate your life.
I assume it's called "Bubble Bread" because it rises into little bubbles of bread when it's baking...whatever the reason for the name, it's good stuff.
Ingredients:
1 can of Pillsbury biscuits
1 jar of pizza sauce
1 cup of mozzarella cheese
Desired toppings (pepperoni, sausage, etc)
Onion powder
Garlic powder
Dried basil
The gist:
Cut the biscuit dough into quarters and toss the pieces in 1 cup of pizza sauce.
Place the dough pieces/sauce mixture in the bottom of a baking dish. Spread em as evenly as you can.
Bake at 375 degrees for 15-20 minutes.
Add desired amount of cheese, toppings, garlic powder, onion powder, and basil. Cook for another 5 minutes until cheese is melted.
Civilized people would probably put this on a plate. I ate it out of the pan...because, well, the plate just slowed down my process. It was delicious!
If you need a quick "throw it together" kind of dinner, this is it!
I hope everyone had a nice Memorial Day weekend!
Tuesday, May 26, 2015
Saturday, May 23, 2015
Beauty on a Budget: The 3 Ingredient Makeup Brush Cleaner
You can do one of two things. You can buy a a makeup brush cleaner product from the store or you can make your own cleaner at home with ingredients you already own. Your choice!
I tried the following method and was very happy with the results! It cleaned my brushes really well and left soft and fluffy.
The gist:
Mix 1 cup of warm water with 1 tablespoon of Dawn dish soap and one 1 tablespoon of vinegar.
Soak your brushes for 20 minutes.
Rinse well and lay the brush out to dry.
That's it! Cheap, simple, and fast.
Tuesday, May 19, 2015
Beauty on a Budget: Nyx Eyebrow Gel & How About A Lift Pencil
Your eyes are the windows to your soul. So your eyebrows are the curtains to your soul? No? Well anyway, eyebrows are pretty important.
I have thick brows, so I never really thought I needed to fill them in. I pretty much just tweeze and trim them as needed. But there has been a lot of hype lately about giving your brows their due attention, so I thought I'd try some eyebrow products and see if they made a difference.
And the answer is: Yes, they do.
I'm not about to spend a fortune on expensive products like the Anastasia Brow Kit, which can run about $36. But never fear! I found a budget friendly option!
I picked up the Nyx "Eyebrow Gel" in "Brunette" at Ulta and a small angled brush to apply it. The gel is $5.99 and comes in a few different shades. I forget how much the brush was, but I looked for the cheapest option possible. I'd guess maybe $5.00.
My first attempt was a little scary. I used way too much product and I ended up looking like a transvestite. I immediately thought of the time on Friends when Ross did Rachel's makeup after she broke her rib and was getting ready for a work party. Any Friends fans in the house!?
Good thing I was planning on jumping in the shower...lesson learned.
So I've realized that alittle tiny bit of this product goes a really long way for me. Once I've applied my foundation I use a little eyebrow brush and comb down the unruly hairs and then use the gel to fill in and hold everyone in place.
I think it really makes my eyebrows look more polished. I don't really NEED them to be any darker, but I like the final result regardless!
The other product I picked up is the Nyx "How About A Lift Eyebrow Pencil". Its double ended and has a dark pencil for filling in your brows on one side and a highlighter for your brow bone on the other. I found it at CVS for $9.99 but it can also be purchased at Ulta. It's marketed as a being a "push-up bra for your eyebrows".
Honestly, now that I have the gel I hardly use the pencil, but I LOVE the highlighter side! I really think it makes my eyes look brighter and more awake. Always a good thing when you're trying to not scare people first thing in the morning at work.
So ladies (and gentlemen, if there are any) if you're looking for a brow product, I like both of these. The only negative I would share about the gel is that it doesn't come in a lot of of shades. So my redheads are most likely not going to find one that will work for them (I'm sorry!!).
One final thought on eyebrows. If you're not wanting to spend additional money on a brow product (totally understandable, fyi) you can always use eye shadow to fill them in. I've used a flat blending brush and a brown eye shadow to fill mine in a time or two and it works pretty well. Just a suggestion!
I have thick brows, so I never really thought I needed to fill them in. I pretty much just tweeze and trim them as needed. But there has been a lot of hype lately about giving your brows their due attention, so I thought I'd try some eyebrow products and see if they made a difference.
And the answer is: Yes, they do.
I'm not about to spend a fortune on expensive products like the Anastasia Brow Kit, which can run about $36. But never fear! I found a budget friendly option!
I picked up the Nyx "Eyebrow Gel" in "Brunette" at Ulta and a small angled brush to apply it. The gel is $5.99 and comes in a few different shades. I forget how much the brush was, but I looked for the cheapest option possible. I'd guess maybe $5.00.
My first attempt was a little scary. I used way too much product and I ended up looking like a transvestite. I immediately thought of the time on Friends when Ross did Rachel's makeup after she broke her rib and was getting ready for a work party. Any Friends fans in the house!?
Good thing I was planning on jumping in the shower...lesson learned.
So I've realized that a
I think it really makes my eyebrows look more polished. I don't really NEED them to be any darker, but I like the final result regardless!
The other product I picked up is the Nyx "How About A Lift Eyebrow Pencil". Its double ended and has a dark pencil for filling in your brows on one side and a highlighter for your brow bone on the other. I found it at CVS for $9.99 but it can also be purchased at Ulta. It's marketed as a being a "push-up bra for your eyebrows".
Honestly, now that I have the gel I hardly use the pencil, but I LOVE the highlighter side! I really think it makes my eyes look brighter and more awake. Always a good thing when you're trying to not scare people first thing in the morning at work.
So ladies (and gentlemen, if there are any) if you're looking for a brow product, I like both of these. The only negative I would share about the gel is that it doesn't come in a lot of of shades. So my redheads are most likely not going to find one that will work for them (I'm sorry!!).
One final thought on eyebrows. If you're not wanting to spend additional money on a brow product (totally understandable, fyi) you can always use eye shadow to fill them in. I've used a flat blending brush and a brown eye shadow to fill mine in a time or two and it works pretty well. Just a suggestion!
Monday, May 18, 2015
Freezer Meals: The Most Delicious/Creamy/Un-Healthy Macaroni & Cheese
If you are on a diet, run away now! This Mac & Cheese will clog every artery you have and will probably make fat instantly appear on your butt.
That being said, it's so freaking good I don't even care about any of that!
I found this recipe on Pinterest via Just A Spoonful Of. Click the link for the full ingredient list and directions.
With the original ingredient quantities I was able to make a small pan to eat now and 4 freezer containers for later! The ingredients cost about $15, making it about $3 per meal.
Check out the details on Just A Spoonful Of!
That being said, it's so freaking good I don't even care about any of that!
I found this recipe on Pinterest via Just A Spoonful Of. Click the link for the full ingredient list and directions.
With the original ingredient quantities I was able to make a small pan to eat now and 4 freezer containers for later! The ingredients cost about $15, making it about $3 per meal.
I got these little round tins (think small to-go sized container) in a 4 pack for $1 at Dollar Tree. They have a much better selection of these types of disposable pans than even Walmart or Target, so I'll be shopping for them there from now on!
Saturday, May 16, 2015
Organizing on a Budget: The Great Bathroom Makeover
I don't know about you, but when my world isn't organized, I can't really function. My desk at work is always neat and tidy because I can't work with it any other way. But sometimes certain areas of my home get...ummm...neglected.
So this is super embarrassing for me to share...but my bathroom kind of exploded. And it's been a nightmare trying to find anything in this disaster area.
The Before:
I took a trip to the Dollar Tree and picked up some baskets on the cheap, and then followed up at the Target Dollar Spot for some cute little tags and some little nick nack organizers that I used for my hair bands and bobby pins. This project was a great opportunity to break out my label maker too! In total I spent about $10 on supplies. I had a few little baskets already, so I repurposed those as well.
The After:
Here are the categories I used:
- Hair Care-Shampoo, conditioner, hairspray, and other random products
- Hair Tools-Blow dryer, curling iron, and flat iron
- Body Care-Lotions and tanning products
- Nails-Polish, remover, fake nail kit, and extra files and cuticle pushers
- Health-Medicines and first aid products
- Travel-My little bottles of products for taking on trips and makeup bags
- Misc. Hair and Body-Randoms that didn't really need to be in my easy to access baskets
- Cleaning-The usual suspects
I keep my makeup organized in a three shelf unit on my counter and my makeup brushes are in a little jar next to it. So I was sort of organized-ish before....right?
I highly recommend the Dollar Tree for your basket needs! You will find similar items at Walmart and Target for $9+ more. It's a no-brainer!
Friday, May 15, 2015
Some "not so favorite" products
I don't mind trying new products when they are decently priced. And usually, unless they are truly terrible, I will use them up and just not buy them again. Here are a few "not so favorite" products that I've tried recently. Sorry if you love them, these are just my personal thoughts :)
Revlon Bold Lacquer Mascara
I ran out of my usual L'Oreal Voluminous Volume Building Mascara and decided to give this a try. Plus, CVS had a buy one get 1/2 off deal and I had already convinced myself that I needed another Revlon product. I reaaaaally tried to like this product. But it just doesn't do it for me. It's very dry and I feel like it sticks to the wand more than to my lashes. I also feel like I have to use a lot of it to make a noticeable difference in my lashes, which is time consuming and can get goopy. I'm going to use it until it's gone, but I won't be repurchasing. Honestly, this is the first Revlon product in several years that I have been disappointed by, so I won't hold it against them...much.
Jergens Natural Glow + Firming Daily Moisturizer
By now you may know that my favorite self tanner is L'Oreal Sunless Tanner (for a self tanning tutorial read this post). But I wanted to give Jergens another try since it had been several years since I used it and they had a few new products out. Still not a fan. The smell is much improved but the overall product doesn't work for me. I look very streaky and far more orange than when I use the L'Oreal product. I tried building the color for several days and it just didn't seem to improve. So I think I am officially giving up on Jergens.
L'Oreal EverPure Volume Shampoo and Conditioner
Since I've just tooted L'Oreal's horn twice it's time to knock them down a peg. I tried the EverPure
shampoo and conditioner because I had read on another blog that they were pretty good for volume. However, I found them to be very drying for my hair and sticky when it dried. Maybe that's part of the "volume" building at the roots, but I didn't like it. I did enjoy the smell, which is rosemary and juniper--not a smell you find often in a shampoo. But otherwise, not a fan. Sorry L'Oreal!
So this was kind of a downer of a post, but hopefully educational!
Thursday, May 14, 2015
Beauty on a Budget: Hair Care Favorites
I'm pretty low key when it comes to my hair. I don't color it and I get it cut maaaaaaybe twice a year. I'm pretty sure my stylist hates me because she always has such an overgrown mess to deal with. I also happen to have a lot of hair....and it's wavy. Which means that I can be easily mistaken for Hagrid when I don't tame it. I used to say Cousin It, but that's an insult to him. His hair is always smooth and well groomed.
My first favorite is the Aussie "3 Minute Miracle Moist Deep Conditioner". I consider this to be "serious" conditioner that you wouldn't really use everyday. Maybe one every week or two. After you shampoo apply the conditioner from roots to ends and let it sit for 3 minutes while you go about your shower business. It's a thicker product so you want to make sure you rinse well. I promise that your hair will feel amazingly soft and smooth when you're done! And it's a whole $2.99...that's my kind of price!
My other favorite is the Tresemme Fresh Start Dry Shampoo. I LOVE this stuff. Because of my insane hair I wash, blow dry, and flat iron it every two days. On my "no wash" days I use this stuff to refresh my hair so it doesn't look slept on. Plus, it works really well as a texturizer. Most texturizing sprays or powders are pretty pricey, so the fact that this works for that too is awesome! Just spray the product at your roots and work it through your hair. Then style as usual. If you want to use for volume, spray at your roots and using a teasing comb after. You can find this at drugs stores, Ulta, Target, etc and it's only $5.99!
So there you are! Two low cost favorites of mine to make your hair look fabulous!
Wednesday, May 13, 2015
Freezer Meals: Chicken and Cheese Enchiladas
Do yourself a favor and jot this recipe down! These enchiladas are my favorite and reheat very well. I made a small batch for dinner tonight and another medium sized batch to freeze. I don't have a lot of mouths to feed, so you may need to up your recipe to meet your needs!
Ingredients:
1 large boneless/skinless chicken breast cut into small pieces
1 cup of diced onion
2 teaspoons of minced garlic
1 tablespoon butter
1 can of green chills (however hot or mild you want)
1 can of green enchilada sauce (I use Hatch medium spicy)
8-10 corn tortillas
1 1/2 cups of fiesta blend shredded cheese
1/2 (ish) cup of heavy cream
Cumin
Oregano
Salt
Pepper
Directions:
I'm not much of an "exact measurer" when it comes to cooking. Baking--yes, but not cooking. So forgive my vague directions!
Heat butter in a medium skillet and sauté the onions and garlic until soft. Add the can of chills and heat through.
Add the chicken and season with a generous amount of cumin and oregano, and salt and pepper to taste. Add about 1/4 cup of green enchilada sauce to the skillet.
Once chicken is cooked through, turn off heat and add 3/4 cup of cheese (put the rest aside to top the dish). Mix until you have a cheesy/chickeny blend of deliciousness!
Steam the tortillas in the microwave (wrap them in a damp paper towel and then in plastic wrap) for 1 minute.
Fill the tortillas with the mixture until you've created a single layer in the pan. Top with the remainder of the green sauce, the heavy cream, and cheese.
Bake at 350 for 20 minutes or until cheese is bubbly.
Seriously. Delicious.
If you choose to freeze the dish, I recommend using a disposable pan like I did in the other freezer meal post. I would also refrain from topping with the cream until you plan to bake it. Bake from frozen at 350 degrees for about 45 minutes or until heated through.
I didn't have the willpower to take a picture of the dish after I took it out of the oven (I was too busy stuffing my face). Sorry!
Tuesday, May 5, 2015
Beauty On A Budget: Ponds Cold Cream Cleanser
This is a product that I started using a few months ago. I had been using the Pond's "Wet Cleaning Towelettes" for a while to get the remainder of my makeup off after washing my face. I was seriously APPALLED by how much makeup was still on my skin after I had used a face wash product.
I loved the towelettes and intended on purchasing them again until I saw the "Cold Cream" on the shelf. For some reason it just sounded refreshing and I wanted to give it a try. And with it only being $4.99 for a 6.1oz jar, I figured I couldn't go wrong.
Let me tell you, I really like this product! It's smooth, refreshing, and smells so clean. It's also amazing as a makeup remover (again, so much left over makeup). I apply a small amount of it as soon as I get out of the shower or wash my face. I only leave it on for a minute or so and then I use a washcloth with warm water and gently wipe it off. Its great for my sensitive skin, especially around my eyes when I remove eye makeup.
You can rinse the rest of it off your face, or leave the remainder to act as your moisturizer. I do the latter because it's very hydrating without feeling super greasy.
I don't see any reason to use an expensive face product when I get such great results with a $5 drug store product. Since using this to get the excess makeup off, I've also noticed fewer breakouts. So if you're looking for a cheap option, give this one a try!
Friday, May 1, 2015
Date Night Ideas For Frugal Folks
Happy Friday, everyone!!
I think we can all agree that date night is an important part of relationships. It allows you to reconnect after a long week and for those of you with little ones, it allows for some much needed grownup time!
It is possible to have date night without breaking the budget. Here are few ideas to help you and your honey get your date on!
Dinner And A Movie:
Revolutionary, right!? Picture it--dinner at Olive Garden with a coupon (google "Olive Garden Coupons" and you are bound to come up with something), or with taking advantage of one of their promotions! Add in the all you can eat breadsticks and salad and I'm a happy camper! Some of their best promotions are the "Buy One Take One" where you get a meal there and a whole other meal to take home for about 15 bucks, or the "Never Ending Pasta Bowl", which is basically all you can eat pasta. Yes please!
For the movie, buy the tickets but skip the snack line. Before you hit the theater stop at Walgreens for candy and bottled drinks on the cheap. I bring my embarrassingly large purse and stock it full of goodies. You can go one further by popping popcorn at home and putting it in a big ziplock.
The At Home Date:
Go get a Redbox movie you meant to see in the theater and didn't get to. It's usually $2 for a movie. If you sign up on Redbox.com you will get a coupon for a free movie just for signing up and they will send you deals periodically.
Light some candles, get an $8 bottle of Mascato from Walmart, and snuggle up.
Game Night Double Date:
I can almost guarantee you that you have some board games stashed away somewhere that you haven't played in a while. Invite another couple over and dust off one of those games. Do a potluck dinner or just throw something together on the cheap and have a couple of drinks and laughs!
For my not-so-easily-offended readers, borrow Cards Against Humanity and have yourself a really inappropriate laugh! You can actually download the card for a small fee and print them yourself if you don't want to pay full price for the game. This is not a game sold in stores, so hit up Amazon.com if you want to own it!
Those are my top three date nights on the cheap! What are your favorite go-to dates? Share in the comment section!
Thursday, April 30, 2015
Style On A Budget: Target Fashion
Target has seriously stepped up their game with work fashion over the last year or so. They have a new section called "Wear to Work"...and I do.
I've found a number of my staple work items there including, ankle length pants, a pencil skirt, cardigans, blouses, a suit jacket, shoes, and the list goes on.
Below is a collection of some of my current favorites from Target.
I love that they offer more tailored looks for ladies on a budget! I used to rely on twice yearly trips to the outlet mall to get pants that are work appropriate, but now I can just drive to Target!
The Target website has a lot of items that aren't sold in stores, so be sure to check that out as well.
Wednesday, April 29, 2015
Beauty on a Budget: Revlon "Colorburst Matte Balm"
I'm a big fan of matte lipsticks for everyday wear. They can really bring your look together and a bold lip can be so beautiful when done right.
The next shade I have is "Sultry", a much deeper wine color. I LOVE this shade all year round, but especially in the fall. It's such a beautiful mix of red and pink and, again, goes with most everything. This is still my favorite between the two.
While I keep my makeup pretty neutral for the most part, I like a pop of pink to brighten up my face.
Revlon's "Colorburst Matte Balm" are only $6.84 and can be purchased at the usual places (Walgreens, Target, Walmart, etc).
This first color is in the shade "Elusive" and is kind of a Barbie pink in my opinion. It's much more pink than the matte shade of the tube it comes in, but I think it's really pretty for spring and goes well with most everything!
My one suggestion is to try them on your hand before you buy. I know they don't really want you to do that in the store, but the shade of the lipstick isn't really the same as what the packaging would lead you to believe. So you may want to test it with your skin tone first.
For a beautiful lipstick on a budget, you can't go wrong with these!
Tuesday, April 28, 2015
Beauty On A Budget: Freemans "Avocado & Oatmeal Clay Mask"
First, you're welcome for this picture.
Second, this is a pretty great clay mask.
Third, it's only $3.27 per bottle!!
I use this a few times a month to help with oily skin, which is kind of a regular occurrence in the summer in Texas. It leaves my skin soft and not overly dry. I put it on after I get out of the shower and let it sit on my skin for about 10 minutes or so, then rinse with warm water and pat my face dry.
If my skin feels too dry before I go to bed, I'll put a very small amount of moisturizer on to rehydrate.
For the price, you really can't beat it. You can purchase it at the usual stores, Walgreens, Walmart, Target, etc.
What's your favorite budget friendly face mask?
Sunday, April 26, 2015
"There's An App For That..." Walmart Savings Catcher Addition
I have a complex relationship with Walmart. When it comes down to it, Target will always be my first choice. But Walmart is just so darn close to my house. For quick trips for groceries or household needs, I usually go to Walmart. But you best believe that I will drive past three Walmarts to get to Target if I have the time!
The Walmart Savings Catcher App is pretty awesome and extremely straight forward! All you do is scan the QR code at the bottom of your receipt with the app and it will submit your receipt information to compare it to their competitors. If they find a lower price at another store you get the difference refunded to you on a Walmart gift card!
It takes a few days for them to complete the comparison, but once they do they will email you and let you know. So far, I have received a little over a dollar back. I'll be waiting to redeem my gift card until I get a least $5.
If you're a frequent Walmart shopper, you should definitely look into this! If nothing else, it eliminates the need to price match every item.
Have you tried the "Walmart Savings Catcher" app? Leave me a comment with your thoughts!
Saturday, April 25, 2015
Style On A Budget: Goodwill Fashion
To compliment the "Beauty On A Budget" series I'll be doing some posts about "Style On A Budget". I work in an office setting where we are expected to wear business casual attire 4 days a week and jeans are allowed on Fridays. I enjoy dressing up for work, but I don't enjoy the price associated with it. So I've learned to be thrifty with my work style!
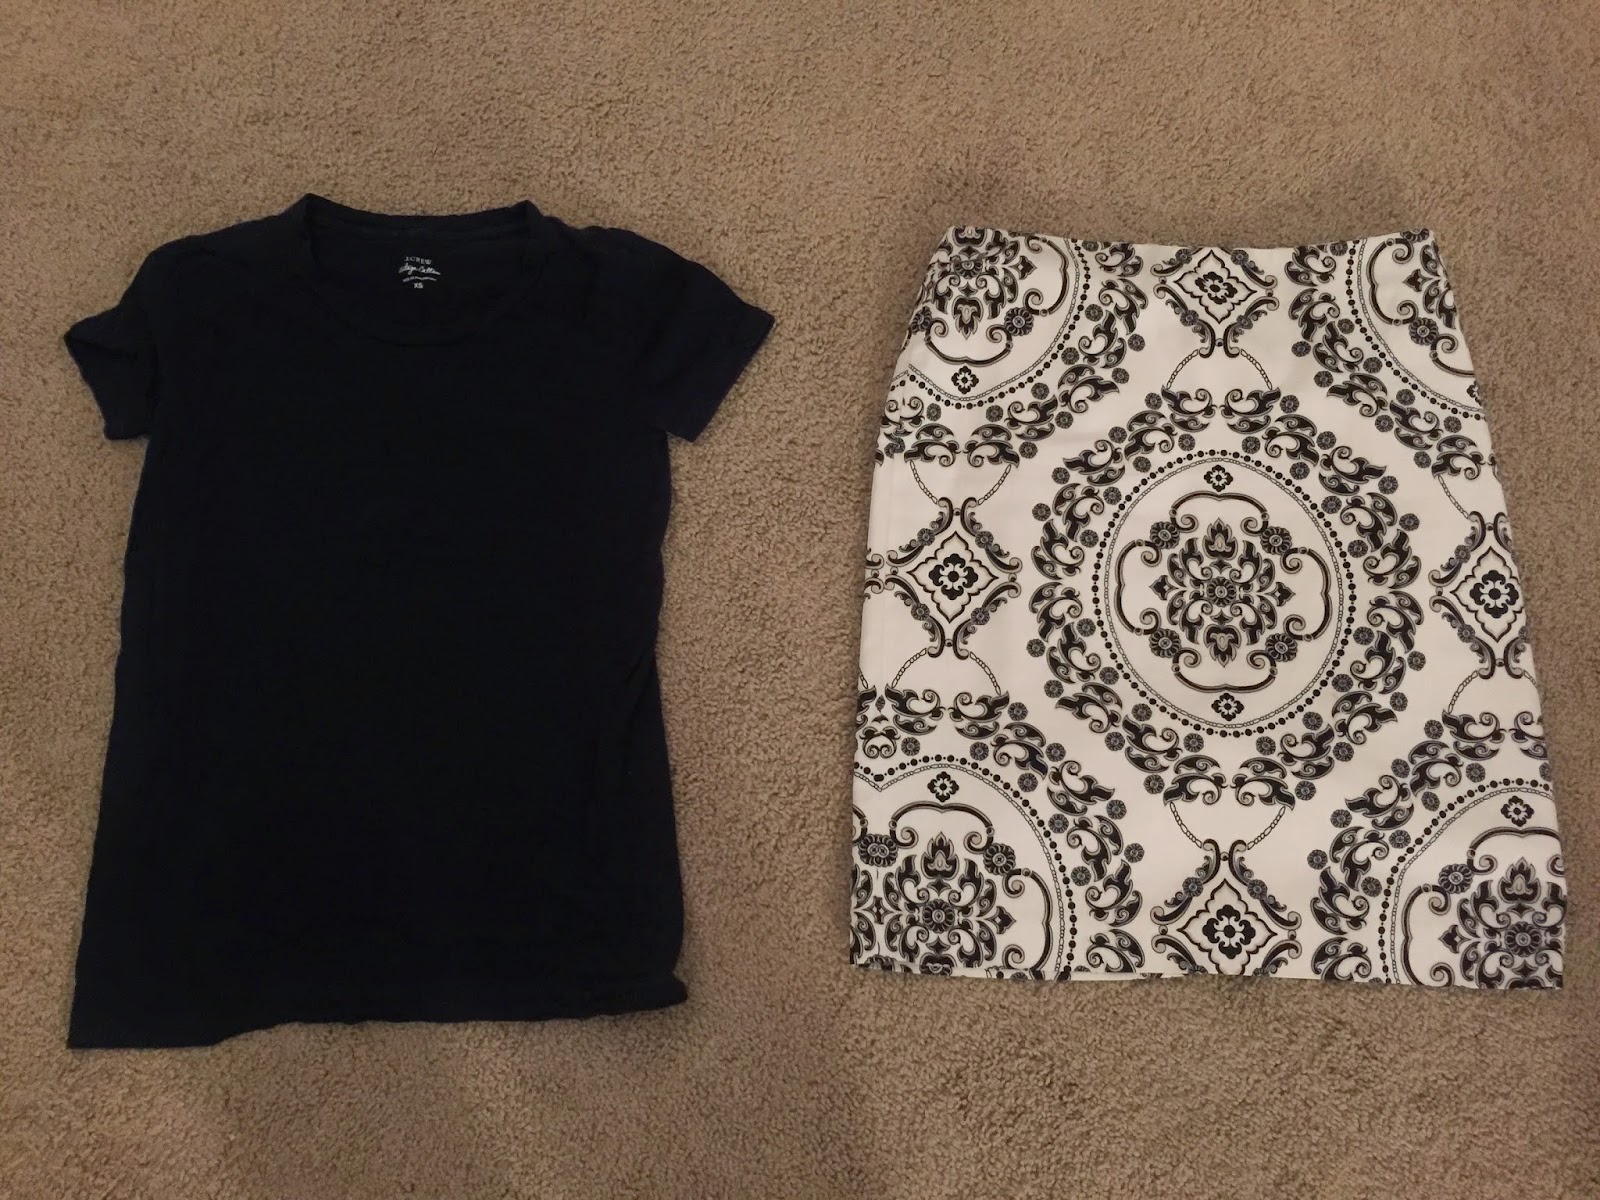
This past weekend I found a navy blue J.Crew brand t-shirt and a White House Black Market a-line skirt! If you're not familiar with these brands, they are pretty darn expensive. After doing some research I discovered that the skirt retailed close to $100...and I bought it for $5.99. My total for the day was $9.72.
I could not believe how many brand name items I found at my local store. I came across a pair of Ann Taylor pants with the tags still on and another J. Crew shirt. I had no idea I would find such cool stuff!
Obviously, I will not always find such awesome deals on designer brands, but so far I am VERY impressed with the Goodwill! I've decided to make it a weekly ritual to drop by the store and see if there is anything that catches my eye. I set aside a certain amount of money each month for clothes, and I definitely get more bang for my buck at the Goodwill.
Have you had good luck at the Goodwill? Share your finds in the comments section!
Thursday, April 23, 2015
Keurig Iced Coffee...Without The "Iced Coffee" Pods
Coffee. Ahhhhhh. Just the word brings such joy to my frugal heart!
Thanks to Jessica Garvin at Little Baby Garvin for the coffee inspiration! You're a girl after my own heart! Check out her blog for some seriously funny toddler tales and amazing chalkboard art!
I don't know about you, but my Keurig doesn't brew cold drinks. And I love iced coffee all year round. Oh, its 35 degrees outside!? Please wait while I purchase my frappucino. That's how much I love iced coffee.
One of my favorite lifestyle bloggers has a super easy recipe for iced coffee using the normal hot brew coffee pods. Here's the gist:
Get yourself a metal cocktail shaker. I got mine at Walmart. Because I'm classy like that.
Brew your favorite coffee blend directly into the shaker. She brews the 8oz option, but I added an extra 4oz to mine.
For the love of all things holy, use a washcloth to pick up the METAL object you just poured hot liquid into. You will, in fact, cause third degree burns on your hand without it...like I might have.
Put your metal cup of deliciousness into the freezer for about 15 minutes. If you're brewing less than me you probably don't need to leave it in there for as long.
Pour over ice and add a splash of half and half and some sugar. Stir. Sip. Enjoy!
Thanks to Jessica Garvin at Little Baby Garvin for the coffee inspiration! You're a girl after my own heart! Check out her blog for some seriously funny toddler tales and amazing chalkboard art!
Wednesday, April 22, 2015
Beauty On A Budget: E.L.F Radiant Glow Primer
As you know, I'm a fan of of E.L.F's "Mineral Primer", which is a clear product. When I went to repurchase it I noticed the "Radiant Glow" version and thought I would give it a shot. It's supposed to give you a "dewy" shimmer.
It's still a very silky smooth feel but looks more like a shimmery foundation than a primer.
I applied it to my entire face, including my eyelids. Then I applied my tinted moisturizer and foundation. After adding my bronzer, I put a little bit more of the primer on my cheeks and brow bones.
I finished with my eye makeup and some lipstick--and there you have it.
Overall, I think it's a good primer. I wouldn't necessarily rave about the "glow" aspect, but it's not bad! If you're looking for something to add to your summer beauty routine for a little extra sparkle, this might be what you're looking for!
Tuesday, April 21, 2015
Couponing: Do's and Don'ts
I could probably write a million couponing posts. But first things first--the do's and the don'ts.
Couponing Do's:
DO coupon! Because if you don't you're wasting money, and wasting money makes me very sad.
DO use manufacturer coupons and store coupons together! You can use two coupons on one items as long as one is a manufacturer offer and the other is specific to the store you're in. Usually the store coupon will have the store logo on it or it will say the store's name at the top.
DO look online and in the newspaper. You can preview what will be in the Sunday paper by visiting sundaycouponpreview.com. That way you can decide before you buy a paper whether there is anything in there worth your time and money. Then visit coupons.com and print out manufacturer coupons! You will need to install their coupon printer app, but it's easy peasy. Also check the store website you frequent--they usually have their own set of coupons.
DO organize your coupons and your list before you shop. You can definitely do your shopping on the fly, but you're risking losing out on a good deal. If you have your items and coupons organized before you go, you will know exactly what to get and what to expect. This is even more important when you get to the register. If you're like me, you're going to lose your focus watching the price rise. Then you will forget how much something was supposed to cost or forget a coupon. And that just sucks. So have it written out and your coupons clipped together so you can easily refer to them!
DO read the fine print! That will tell you how many products you have to buy, what size it works for, and if there are any other exclusions. Few things suck more than not being able to get a deal you expected because you failed to read the rules.
Couponing Don'ts:
DON'T print out every coupon just because its there. You don't need Depends just because they're on sale. Or maybe you do. That's none of my business.
DON'T print a coupon that requires you to buy 3 perishable items if you won't use them. It's not a good deal if the majority of your items are going to expire before you have a chance to use them. If you will definitely use them, great! But don't get suckered in just because you'll save a buck!
DON'T buy stuff you "think" you'll use. Because you probably won't. I have been known to buy lotion or body wash in a scent I don't really like just because it was cheap with a coupon. I convince myself that I can get used to the smell. Well, I can't. I bought a coco scented lotion that made me feel like a walking fudgesicle. I didn't like it. I wasted money for sure. It's also still in my cabinet, so if smelling like chocolate is your thing it's all yours.
DON'T use the coupon the first chance you get. More often than not you will end up with a better deal if you just wait. Some coupons expire quickly, so it's better to use them as soon as you can. But others may not expire for several weeks. Wait and scope out deals. You might find that the product went on sale in addition to having your coupon! I sure love when that happens!
And, Never, Never, NEVER let someone tell you that your coupon is no good. If that sucker is not expired and matches the product you have, get a manager to override the register. Sometimes their systems will have issues with coupons--that's not your problem. If you ask nicely, they will usually just manually enter it in. After all, it's the company that will pay the coupon price, not them. To keep you happy, they will usually make it work.
I will do more posts on couponing soon. But here are some basics to get you started!
Monday, April 20, 2015
The Fabulously Frugal Pet
Our pets are pretty simple creatures, but they can get pricey. Especially when you start adding in medical expenses. Here are a few tips on how you can save on your pet's necessities!
PetPerks and PalsRewards
Both Petsmart and Petco have free rewards clubs you can sign up for. Just like with any other reward card you will usually get a better deal on promotional items by using your card or typing in your phone number. I personally shop at PetSmart and I almost always get a few bucks off my cat's food and litter just by using the rewards program. They will also email you coupons and deals coming up.
Store Ads
Just like Target or Walmart, both stores put out weekly ads that have promos and coupons in them. And because both Petsmart and Petco also do grooming at most locations, they offer money off their pet pampering services. Check out their ads in store or online!
Wholesale Pet Supply Stores
I used to live near a wholesale store that was frequented by groomers, trainers, and hardcore pet owners. They could buy in bulk and get discounts for being business owners. They also had larger items like dog and cat beds, cat condos, and kennels for cheaper than you could find at the usual stores. Be warned though, some of them require you to own a pet-related business in order to shop with them.
Overstock.com
Yep, Overstock.com pretty much sells everything, including pet supplies at a discounted price. This is probably a better deal for things like cat condos or high quality beds and carriers, but it's nice to know they're there!
Coupons
I've actually seen a lot of coupons for pet stuff. Usually food, treats, and litter. In fact, as of this post I have a manufacturer coupon for $2 off Fresh Step litter, which is currently on sale for $9.99 at Petsmart. That's a pretty good deal for 25lbs of litter! And Petsmart accepts competitors coupons as well, so make sure to compare stores to get the best deal!
I have to add a disclaimer to this post. I worked as a veterinary assistant for 5 years both in general practice and in speciality/emergency medicine. I saw A LOT of animals come in with horrible reactions to cheap flea and tick products and heartworm products that their moms and dads bought places other than their vet. I really don't support going cheap when it comes to medicine or medical care if you can avoid it. There is a reason certain products are preferred by your vet, and it's not because they make some huge profit off of them. Trust me, they don't. Please talk to your doctor about what products they recommend for your pet and educate yourself before buying!
So there you go! Some ways to save on your fur babies supplies!
My Editor In Chief, Tabitha, playing with socks.
Sunday, April 19, 2015
Beauty on a Budget: The At Home Spray Tan
I am not a supporter of tanning beds. I'm sorry if you like them, but I am claustrophobic and also worry about skin cancer. So in order to get a bit of color to my skin on a budget, I use an at home spray tan method.
Spray tans can be tricky whether you do them in a salon or at home. You always run the risk of it coming out uneven, streaky, or orange. As a naturally pasty gal, I've tried my fair share of "professional" spray tans and have never been blown away by the results. I don't feel like they last nearly long enough for the price and my face ALWAYS ends up being really dark compared to the rest of my body.
For the past two years I have used the L'Oreal "Sublime Bronze Self-Tanning Lotion" and have always been happy with the results. But just a few months ago I added their "Self-Tanning Mist" to my routine and I'm so happy I did! I think it compliments the lotion well and is also helpful for reaching the middle of your back. Each product is about $11 and will last you for a good while, even with applying multiple times for the first week to build up the color you want.
Here are some tips for getting an even and natural looking spray tan, at home:
The Prep Work:
1. Start with clean skin. Exfoliate and shave so your skin it soft and smooth.
2. Make sure you dry off well before you start.
Getting Started:
3. I recommend starting with your legs and working your way up. Apply the lotion in a circular motion. Don't apply too much product to your knees, ankles or feet to avoid them looking orange and blotchy. You'll use the spray product to even these areas out later.
4. Continue applying the lotion in a circular motion on your arms, stomach, chest, neck, and as much of your back as you can reach (don't dislocate your shoulder, remember you have the spray!). Like with your legs, don't apply to much around your elbows or wrists.
5. Wash your hands well when you're done with the lotion and pat them dry.
The Finishing Touches:
6. It's time for the spray! Use this product to liberally spray the tops of your feet and the back of your hands. When you're done, gently pat them with a towel to soak up any extra product.
7. For your face, hold the can arms length away and spray liberally. It's not nearly as concentrated as the lotion so you don't need to worry too much about over doing it with the spray. HOLD YOUR BREATH WHILE YOU DO THIS. We're not trying to get your lungs tan ;) Pat your face gently to get any extra product.
8. Whew! You're done! Walk around in your birthday suit for a bit or use a hair dryer on the "cool" setting to dry yourself. You want to avoid putting on nice clothes or sitting on furniture for about 20 minutes or until your tan has dried. I usually put an old towel down before I sit down just to be safe.
So that's it! Repeat as needed throughout the week until you get the right color, and then do periodic touch ups to maintain it. I have noticed that my face doesn't tan as well with just the spray, so I will use a small amount of the lotion on my face to start and then use the spray to touch up now and then. But if you have a darker foundation or bronzer you can use, that might be enough to even it out.
It may seem like a long process, but I assure you, when you get the routine down, it goes fast. Just remember to wash your hands after so you don't look like an umpa-lumpa!
Happy tanning, ladies!
Saturday, April 18, 2015
Target Swag
There are some pretty good coupons out right now, and some seriously killer sales. So here's another Target post for you!
I had a frugal-ing (is that a word?) fail the other day. As I posted on Facebook, Home Depot had Tide liquid detergent for almost 50% off! But by the time I got to the store at 12:30pm, they were sold out. I was pretty bummed.
But on Friday I found out about another Tide deal going on at Target! They were advertising the 54-count Tide Pods with Fabreze in the scent Botanical Rain for $9.99 down from $17.99! On top of that, there was a $2 off one coupon for Tide Pods AND a $5 gift card offer when you purchased 2! I KNOW, RIGHT!?
As soon as I got off work I went home to print the manufacturer coupons off and I headed to Target. But yet again, they were out of the size that was being promoted--meaning the deal was a no go. I ran into another lady looking for the same thing, and we were both super bummed. Turns out, she also had the Home Depot let down the day before. We had both checked online to see if the product was in stock prior to going to Target, which compounded our sadness.
Thankfully, my new friend asked an employee what they could do for us in this situation. I mean, if their system had updated properly, she and I could have saved ourselves a trip to the store. And by the grace of the couponing gods, the employee said they would honor the deal for any size container as long as it was originally priced at $17.99! So we both ended up getting two containers of the 72-count for the advertised price of $9.99 each, plus the $2 off coupon and the $5 gift card! In the end, I paid $5.49 per container. Woohoo!
I also got some great deals on razors and a buy one get one free on my contact solution. When all of the savings were calculated, I ended up getting 2 large containers of Tide Pods, 4 packages of razors, and two bottle of contact solution for $43.99. I had a $25 gift card to use (Yay, Shopkick!) so I only ended up paying $18.99 on my Redcard.
Have I mentioned how much I love saving money?
Here is the moral of the story: always ask if they will honor the deal! Most stores want to ensure your happiness as a customer. You never know until you ask!
Follow my Facebook page for updates on new deals!
Friday, April 17, 2015
"There's An App For That"...Cartwheel Addition
Target is my favorite store. Ever. My "mothership" if you will. Give me a Target with a Starbucks in it and I can stay there all day.
When I discovered the Target "Cartwheel" App I was ecstatic! Saving money on top of store and manufacturer coupons is amazing! It's easy to use and will even tell you how much you've saved using the app (I recently realized that your savings calculator zeros out at the beginning of the year...oh well.). You just select the products you plan to purchase and have them scan the barcode on your phone at the register to apply the discounts.
If you are using coupons in addition to the app, the sales associate will need to scan all of your coupons first because Cartwheel will take the percentage off the lowest price on the register. So have your coupons ready first.
Depending on the item, you can usually use the same offer multiple times, even on the same transaction. Check the find print on the offer for the details!
I have scored some MAJOR savings by using a Cartwheel offer, a target store coupon, and a manufacturer coupon on the same item. I've also noticed that Target will usually have items they feature on Cartwheel on sale already. An even nicer gift from the store!
I really have nothing but awesome things to say about the Cartwheel app. It's free and can be combined with savings with your Target Red Card (5% off with either their credit card offer, or by linking your existing checking account...also free!).
My fellow Target addicts...you must Must MUST try this app!
Target is not compensating me for this post. All opinions, comments, and spending are my own ;)
Thursday, April 16, 2015
Amazing Chicken Salad
Several years ago my friend made the most amazing chicken salad, so I of course asked for the recipe. This is out of a cookbook, but I have no clue whose, so I apologize for not being able to give them credit. Your chicken salad is AWESOME, whoever you are!
I'm a purest with most foods. This holds true for chicken salad. If you want to spice up this recipe by adding in extra things, go on with your bad self! Most everything I usually have on hand, so there isn't much planning needed.
Cook Time: 25-30 minutes
Prep Time: 10 minutes
Bake at: 350
Ingredients:
2 boneless/skinless chicken breasts
3/4 cup of mayo
1/3 cup of chopped green onion
1/3 cup of finely chopped celery
Garlic powder
Dried basil
Dried rosemary
Salt
Pepper
1 cup of water
Instructions:
Pre-heat the oven to 350 degrees.
Put the two thawed chicken breasts in a shallow baking dish with a cup of water. Next, season both sides of the chicken with a generous amount of the garlic powder, basil, rosemary, salt, and pepper (yes, you will put one side in the water, which will make some of the seasoning come off. It's ok).
Cover the dish with foil and bake for 25-30 minutes, or until the chicken is cooked through.
While the chicken is cooking, combine the mayo, green onion, and celery in a small bowl. Set aside.
When the chicken is done, put it on a plate to cool completely. Then, either by hand or with a food processor, chop or shred the chicken. Combine the chicken with the mayo mixture and refrigerate for several hours. You want the flavors to have time to mix and set.
Serve on flaky sourdough rolls for sandwiches, or eat straight out of the bowl like an animal...like me.
This is great for a road trip meal if you're planning to stop for a picnic!
I really hope you enjoy this simple and delicious chicken salad!
Wednesday, April 15, 2015
Keurig Savings
I'm a coffee fanatic. I can't make it through the day unless I have at least two cups of coffee. And I've accepted this.
But a daily Starbucks habit can add up quickly! So for Christmas my wonderful parents bought me a Keurig.
Don't misunderstand me, Keurig pods aren't particularly cheap either. But there is a hidden gem that might just help my fellow coffee addicts!
By joining the free online "Club Keurig" you can start earning points, which will eventually allow you to get a certain percentage off boxes of coffee and even machines. Plus, as an added bonus for joining and registering your machine with them (also free!) they will send you a coupon for "Buy Two Get Two Free" on boxes of coffee pods!
I redeemed this offer and got 4 boxes totaling 88 pods of coffee for around $33 and free shipping! That's 37 cents per pod and a savings of $27! I'm definitely set for a while. But when I do need to order again, I have some points already saved up to get a discount on my next purchase. Can't beat it :)
Visit www.keurig.com to join "the club"!
I was not compensated by Keurig for this post. All comments and opinions are my own.
Tuesday, April 14, 2015
Beauty On A Budget: A Frugal Gal's Manicure
If I could go to the nail salon every two weeks to get a manicure, I totally would. But the penny pincher in me knows that it's a waste of money and also kind of a time suck. But that doesn't mean I don't like my nails to look fabulous!
That's where the "Frugal Gal's Manicure" comes in!
This might sound a little middle school-ish, but I've found that the best method for a professional looking manicure without the cost is by using glue-on nails. I can feel some of you thinking "Ummm...no." But trust me, they look awesome!
The product I like is Broadway "Real Life" Nails in "Real Short". I type A LOT, so I like them as short as possible to avoid damaging them on the keyboard. You can find this brand at pretty much every major drug store or retailer like Walmart or Target for about $6!
Each box comes with two sets of nails in varying sizes, nail glue, a small nail file, and a cuticle pusher..basically everything you need except for nail polish remover. For the best results start will clean and freshly trimmed and filed nails. Quickly swipe some nail polish remover over them (even if you don't need it) to help the glue adhere. You also want your real nails to be pretty short so they don't stick out under your fake nails and your cuticles pushed back for a more "polished" look...pun intended.
Use the file to "rough" up your nails so that the glue sticks better. Then apply glue evenly and in a thin layer to both your nails and the fake nails. Then stick em on and twist the tab off. File down any remnants of the pull away tab, and there you have it! A cheap, quick, and easy manicure!
(You have to admit, those look pretty darn good for $6!)
If you're like me, you may be a little more rough on them and have to re-glue from time to time. I lost two on my right hand and had to apply more glue, but I haven't had any of them break or crack. So you may not get two full sets out of one box, but for $6 dollars, it's still not a bad deal!
Well, there you go ladies, the "Frugal Gal's Manicure"! I hope you enjoy and feel fabulous with your new nails!
Subscribe to:
Posts (Atom)